I paint by applying several layers of paint, from darkest to lightest. This is known as layering, the 3-layer style, the Foundry Method, etc. Over a black undercoat, a shadow colour is painted, then a mid-tone, and finally one or more highlights. In 15mm however, I don't leave a black line between colours for definition, relying rather on the shadow colour to define areas in place of harsher black. Click on the images below for larger versions.
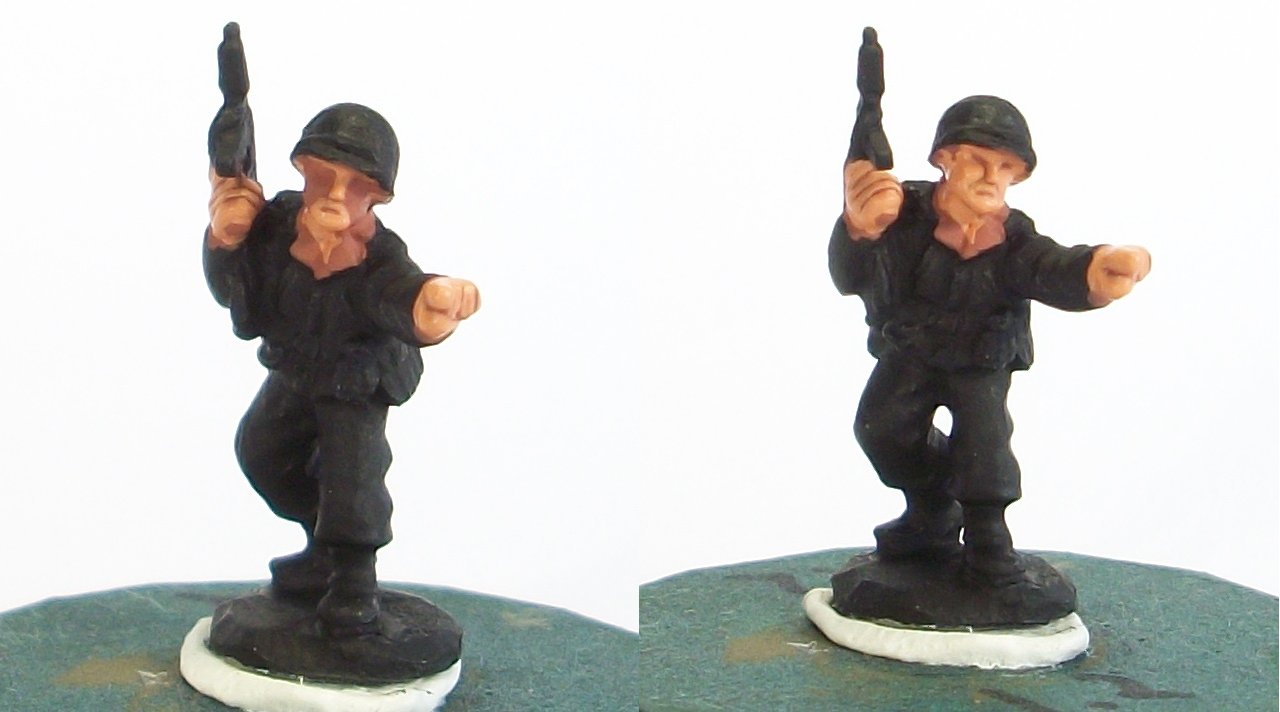
I undercoat with Humbrol No. 33 matt black enamel and leave to dry overnight: use whatever you like however, as long as it works for you. The figure here is a US NCO figure from Battlefront's US Infantry Range sculpted by Evan Allen. Colours used for flesh are all Vallejo Game Colour (VGC). I almost always start with the flesh areas, unless the figures have helmets covered with netting, in which case these are done first.

The flesh areas are initially painted with two, thinned coats of VGC Tan. I am not too neat with this: I don't try to mess over everything, but a bit of paint on other areas is no big deal as it will be cleaned up later.

VGC Dwarf Flesh is then used. I block paint with this, meaning basically that I paint the Dwarf Flesh over most areas, leaving the Tan showing in the recesses. These include the mouth, lines around the nose, the eyes, areas between the fingers, etc.
I block paint in two steps. Firstly, the nose and eyebrow areas are painted in a sort of “T” shape, even if the latter messes onto the helmet a little, and then the mouth area is painted, first the upper lip, then a “U” shape around...if that makes any sense. Secondly, the neck and cheek areas are painted in. As the middle of the face is now defined, the cheek areas are easily painted in, leaving the Tan where detail is required.
Most flesh areas are then highlighted with VGC Elf Flesh. I highlight the upper-lip, the nose (not the brow area unless very visible), cheeks, neck, fingers and hands, etc. The highlight I've applied here was pretty heavy, covering most of the Dwarf Flesh areas. You can leave areas on the cheek Dwarf Flesh to create further detail there, and so on. Generally I don't like my faces to look overly detailed at this scale, but that's just me.

Painting the face...

Next, the M1941 Jacket, webbing and leggings are painted with Vallejo Model Colour (VMC) 887 Brown Violet. The whole Jacket is painted, taking care to paint straight lines around the neck and sleeve areas bordering the hands, etc. The leggings and the strap on the Thompson SMG were similarly painted.
The helmet and any other olive drab equipment (Bazookas, the grenade here, etc) was painted with Coat d'arms (CDA) 508 Olive Drab, though VMC Brown Violet with a bit of black added would work just as well. When painting the helmet, the previous areas where the flesh messed onto it are painted over leaving a clean, rounded line between the flesh and helmet.
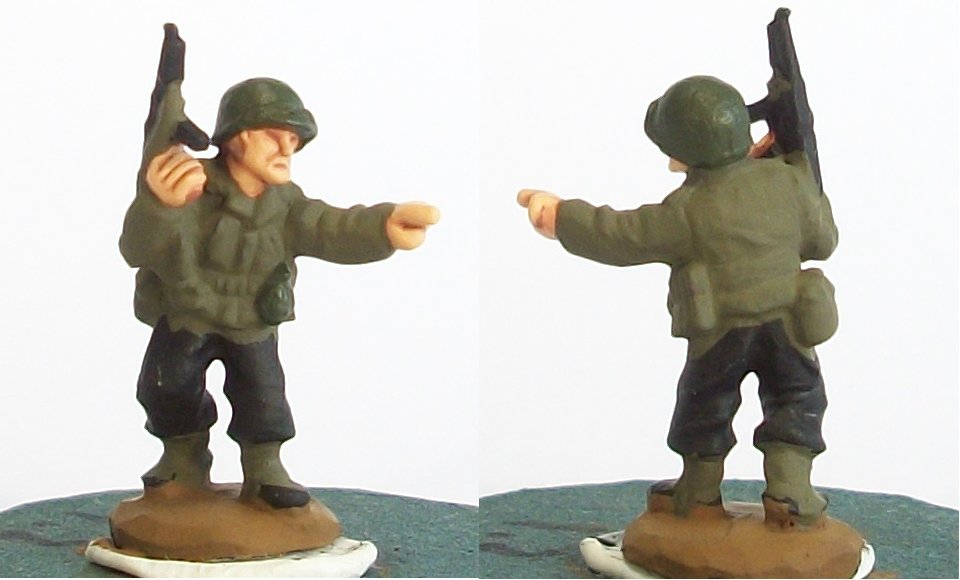
The M1941 Jacket was then block-painted with Vallejo Panzer Aces (VPA) 318 US Army Tank Crew. This is painted over most of the jacket, leaving the Brown Violet in the creases and folds as a shadow colour. The effect is quite subtle, but since the folds are quite subtle on these figures I prefer a smoother transition between colours. The figure below shows the first coat on the M1941 Jacket and the Green Grey webbing: the colours were too similar for my liking, so I later changed the webbing colour.
(Note: I started the webbing, leggings and straps below with VMC 886 Green Grey, but changed this later as there would not have been sufficient contrast between the Green Grey webbing and the colour chosen for the M1941 Jacket.)

The trousers, boots and wood areas on the weapon were painted with VMC 889 USA Olive Drab. The strap on the helmet was also picking out in USOD, while the webbing was re-painted with VMC 879 Green Brown as an alternate webbing colour. The helmet (visible on the left-had side figure) was painted with a 50/50 mix of CDA Olive Drab and VMC Brown Violet. A shadow is left just above the lower lip of the helmet: further highlights will pick this out more while attempting to produce a gradual transition of colour on the rounded helmet.
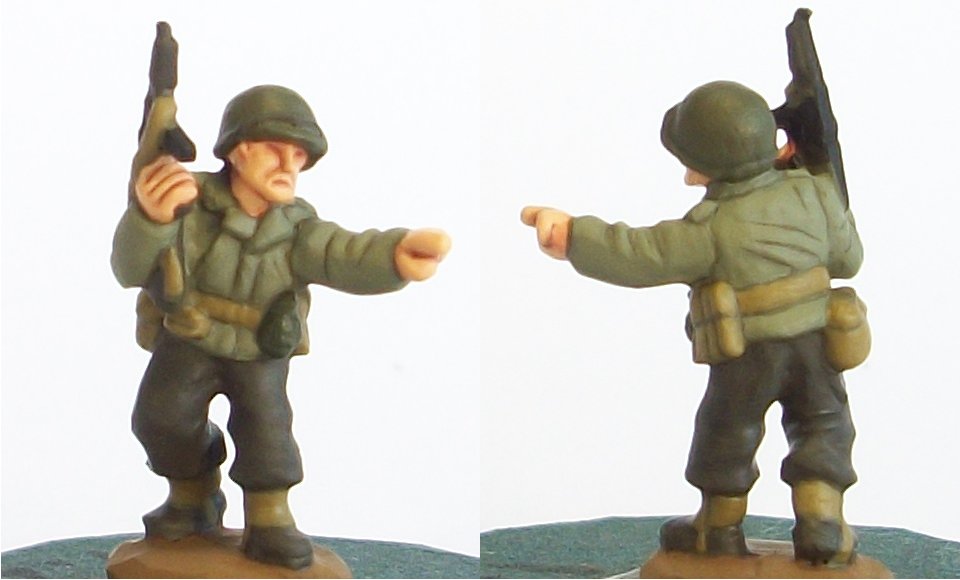
The boots were then painted with VMC 984 Flat Brown, the front strap on the helmet was painted the same colour. The wood on Thompson butt, fore-grip and handle was painted with VMC 983 Flat Earth.

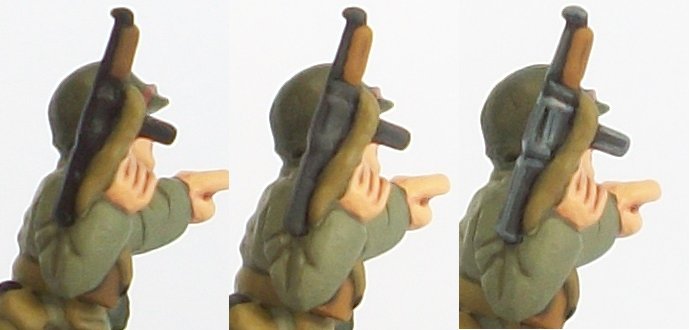
The Thompson SMG was painted in shades of grey for a more NNM (non-metallic metal) look. First with black, then 995 German grey and finally the edges were highlighted with VMC 836 London Grey. This last colour is applied to the edges only, attempting to define the weapon with highlights. The wood parts were highlighted with VPA 311 New Wood.
The webbing was highlighted with VMC 879 Green Brown mixed with VPA Tank-crew Highlight (roughly 50/50). The trousers, initially block-painted with 826 German Camo Medium Brown, were highlighted with VMC 873 US Field Drab (mixed with some German Camo Med. Brown to tone it down a little).

A highlight was then applied to the jacket, a mix of VPA US Tank-crew and the highlight colour, again roughly 50/50.
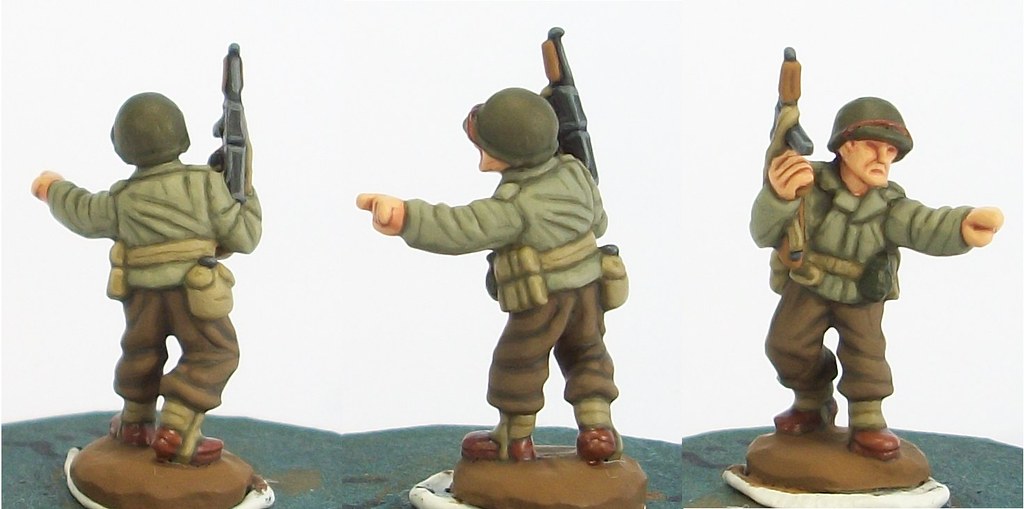
The Helmet was done last, highlighting with VMC Brown Violet, then another thin layer of Brown Violet and Tankcrew Highlight (about 80/20) to the upper areas. The grenade had a few dot of this HL applied as well.

...and you're done. There are several alternate colours which can be used so please don't take these as the "correct" colours, they're just what I'm leaning towards at the moment.
CdlT
This is nice of you.So far,so good!:-)
ReplyDeleteCheers
Christopher
Thanks. I'm too bloody nice for my own good...I have new-found admiration for anyone who has put together a tutorial. It is a surprising amount of work. At least the camera and I have stopped fighting for the moment :)
ReplyDeleteCdlT
Nice tutorial.
ReplyDeleteAny examples of layering for winter settings?
Infantry or armour?
ReplyDeleteUS winter infantry would be similar, with perhaps darker colours for greatcoats, etc. I've never painted winter-themed armour before. Perhaps try working with off-whites and ivory, using white as the last highlight?
CdlT
Nice tutorial, you illuminate me.
ReplyDeleteI follow your works. You have very nice
painting style.
There are NO images just text.
ReplyDeleteI suspect the problem is on your end then, since I have no problem seeing the pictures on two different machines with three different browsers.
ReplyDeleteCdlT
I love your style of painting! I'm such a fan! Picked up a few of your models from Fleabay over the years and they are going to be pride of place in the blog gallery!
ReplyDeletedespertaferres.wordpress.com